Pressing a Button on the Scanner in order to Start an Image Scanning Application and Perform a Scan
This section explains about the basic flow of starting an image scanning application and performing a scan by pressing the button on the scanner.
In this case, you need to configure the settings for the button in advance in order to perform a scan.
The image scanning application that is started up when [F00] is selected in the [Function Selection] screen on the touch screen and the [Scan/Stop] button is pressed differs depending on whether PaperStream ClickScan resides in the taskbar or not.
When it resides in the taskbar
PaperStream ClickScan will be started up.
When it does not reside in the taskbar
PaperStream Capture will be started up.
-
On the computer, set the behavior (function) of the scanner when the [Scan/Stop] button on the scanner is pressed.
Specify which image scanning application you want to start up as a function when the [Scan/Stop] button on the scanner is pressed.
The function specified here will be displayed on the [Function Selection] screen on the touch screen.
Multiple functions can be specified. When scanning documents, you can change the image scanning application used for scanning by switching the functions on the [Function Selection] screen of the touch screen.
The button setting procedure varies depending on the connection method of the scanner.
- When establishing a connection via a USB cable
Display the [Devices and Printers] setting window for Windows, and set the buttons in [Scan properties] for the scanner. For details, refer to Configuring the Settings for a Button on a Computer (For USB Connection).
- When establishing a connection via a wired LAN
Use Button Event Manager to set the button. For details about Button Event Manager, refer to the Network Setup Tool for fi Series Help.
You can view the details of the button setting procedure by referring to the Button Event Manager Help in the following procedure.
- Start up Button Event Manager.
-
For Windows 10/Windows Server 2016/Windows Server 2019/Windows Server 2022
Click [Start] menu → [fi Series] → [Button Event Manager for fi Series].
-
For Windows 11/Windows Server 2025
Click [Start] menu → [All apps] → [fi Series] → [Button Event Manager for fi Series].
When Button Event Manager is started,
 appears in the notification area of the task bar.
 -
- Right-click .
Click [Help] on the menu that appears.
-
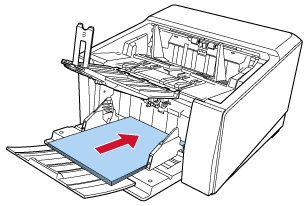
Load documents on the hopper.
Set the documents with the front side (scanning side) facing up.
For details, refer to How to Load Documents.
-
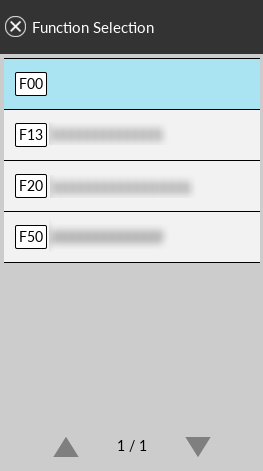
In the [Function Selection] screen, select the operation (function) that occurs when the [Scan/Stop] button on the scanner is pressed.
The function that you specified in step 3 is displayed on the screen.
 ATTENTION
If PaperStream ClickScan is not used, be sure to exit PaperStream ClickScan.
If PaperStream ClickScan is resides in the taskbar, the function list may not be displayed in the [Function Selection] screen.
TIPIn the [Function Selection] screen, only the function selection buttons with names can be displayed.
The settings for displaying buttons can be configured in the screen that appears in the following procedure:
 → [Scanner Settings] → [Function Selection Display]
In the main screen on the touch screen, the selected function name appears.
-
Press the [Scan/Stop] button on the scanner to start a scan
The image scanning application specified in step 3 starts up.
 TIP
TIPFor more details about the operator panel, refer to How to Use the Operator Panel.
Do not perform any of the following operations.
Doing so stops a scan.
Disconnecting the USB cable
Disconnecting the LAN cable
Disconnecting the network
Signing out of the computer