Scanning in Single Feed Mode
-
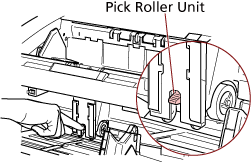
Lift up the pick roller unit.
Push up the tab in the middle with your finger.
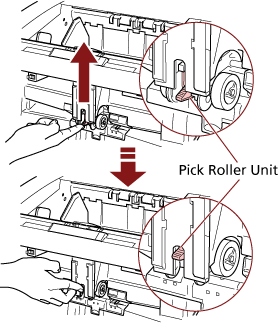
The pick roller unit will click into place.
The hopper moves up to the feeding position.
ATTENTIONMake sure that there is no document left on the hopper.
Be careful not to get your fingers or any object caught when the hopper moves up.
-
Insert the document until the top edge touches the rollers on the inside.
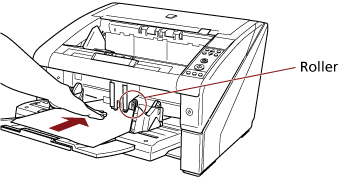
The document is picked, scanned, then ejected onto the stacker.
After the scan, the scanner waits for the next sheet to be fed for the time specified in the Software Operation Panel.
ATTENTIONLet go of the document as soon as you confirm that the document is being fed by the rollers.
-
Repeat step 4 until all documents are scanned.
HINT
Scanning can be stopped immediately by pressing the [Counter Reset] button on the operator panel.
Scanning stops when no document is loaded on the hopper after the time specified in the Software Operation Panel.
The scanner waits for the period of manual feed timeout even when there is no document left on the hopper.
The timeout period for manual feeding can be configured on the operator panel or in the Software Operation Panel.
To release Manual Feed mode, bring the pick roller unit back down to its original position.
Put your finger on the tab in the center and push it down.