Scanning Documents That Are 220 mm to 240 mm in Width
Documents that are 220 mm to 240 mm in width can be fed, but the specification for document sizes that can be scanned is still the same.
For details about document sizes that can be scanned, refer to Paper Size.
-
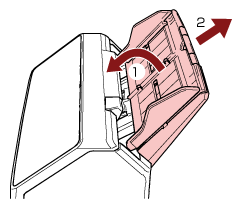
Remove the ADF paper chute (feeder).
Hold both ends of the ADF paper chute (feeder), then lift it in the direction of arrow 1 and pull it out in the direction of arrow 2.
-
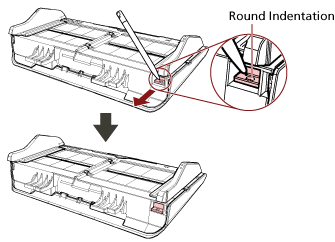
Insert a ballpoint pen into the round indentation on the side guide adjuster of the ADF paper chute (feeder) and pull out the side guide adjuster.
-
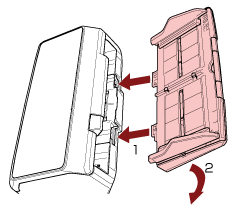
Attach the ADF paper chute (feeder).
Insert the tabs into the slots on the back of the scanner in the direction of arrow 1 and tilt the ADF paper chute (feeder) downwards in the direction of arrow 2 until it locks in place.
Attach the ADF paper chute (feeder) with the side guides facing upwards.
 ATTENTION
Do not leave any space between the ADF paper chute (feeder) and the scanner.
-
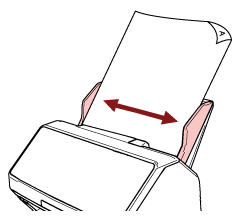
Adjust the side guides to the width of the document.
The side guides can be adjusted in accordance with the width of the document (from 220 mm to 240 mm).
Move the side guides so that there is no space between the side guides and the document.
When there is a space between the side guides and the document, the document may be fed skewed.