Replacing the Roller Set S
The Roller Set S consists of the brake roller and the pick roller.
Replace the Roller Set S in following procedure.
-
Replace the brake roller.
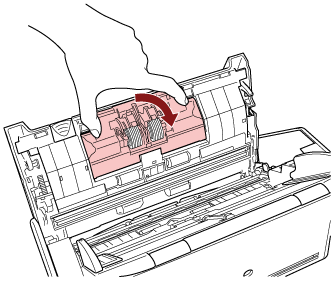
- Open the brake roller cover.
Hold both ends of the cover, and open it in the direction of the arrow.
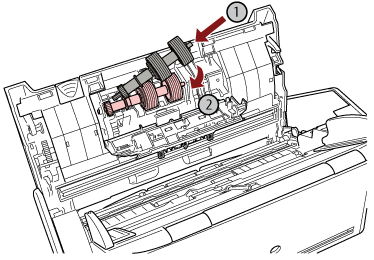
- Remove the brake roller.
Lift the right side of the roller first, then pull out the shaft from the slot on the left.

- Remove the brake roller from its shaft.
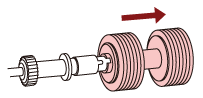
- Attach a new brake roller on the shaft.
Insert the protrusion on the shaft into the slot.

- Attach the brake roller back in the scanner.
Insert the left end of the shaft into the hole in accordance with the hole shape, and then attach the right side of the shaft.
- Open the brake roller cover.
-
Replace the pick roller.
- Open the sheet guide.
Slide the side guides all the way, and pull the sheet guide open from the dip.
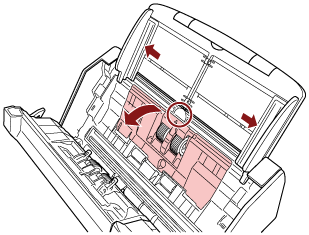
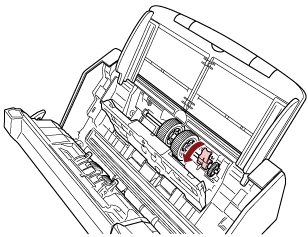
- Rotate the bushing in the direction of the arrow.
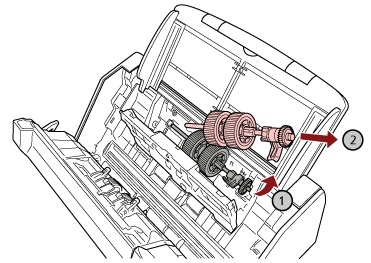
- Remove the pick roller.
Lift up the bushing side of the pick roller slightly (about 5 mm), move it towards the bushing, and pull it out.
 ATTENTION
Be careful not to touch the gear near the bushing on the shaft because it has grease over it.
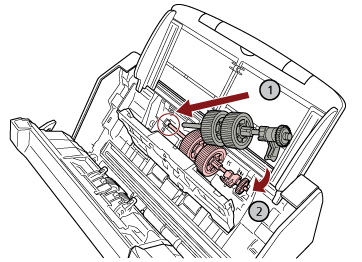
- Install the new pick roller in the scanner.
Insert the left end of the shaft into the slot, and lower the other end gradually.
- Rotate the bushing in the direction of the arrow.
 ATTENTION
Confirm that the pick roller is installed properly. Otherwise, paper jams or other feeding errors may occur.
- Open the sheet guide.
-
Use one of the following methods to clear the counters for the consumables.
The procedure when using the touch screen is as follows.
On the touch screen, press
 → [Cleaning & Maintenance] → [Consumable counters].
On the [Consumable counters] screen, press the [Clear] button for [Brake Roller] or [Pick Roller].
When using the Software Operation Panel, refer to Clearing the Sheet Counters.