Replacing the Pad Unit
Replace the pad unit in following procedure.
-
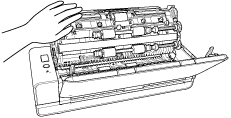
Open the ADF paper chute (feeder).
-
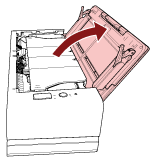
Open the ADF.
For details, refer to How to Open the ADF.
Perform the following steps with the ADF open.
When the ADF is open, it might close accidentally. Be careful not to get your fingers caught.
ATTENTIONHold the ADF with one of your hands to keep it open. When you release the ADF, it closes.
-
Remove the pad unit.
Squeeze both ends of the pad unit (gray parts) and pull it out in the direction of the arrow.
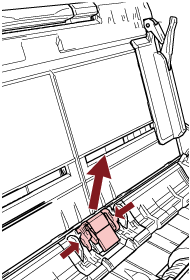 ATTENTION
Do not hold any parts other than both ends of the pad unit (gray parts).
-
Attach a new pad unit.
Attach the pad unit so that the protrusions are placed as shown below.
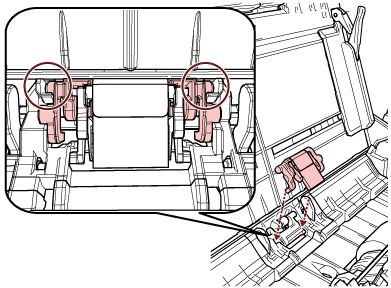 ATTENTION
Attach the pad unit with the front side up. If the pad unit is attached upside down, paper jams or other feeding errors may occur.
Make sure that the pad unit is attached firmly. Otherwise, paper jams or other feeding errors may occur.