Performing a Scan with an Image Scanning Application
This section explains about the basic flow of performing a scan using an image scanning application on the computer.
In this case, a scanner driver and an image scanning application that supports the scanner driver must be installed on the computer.
The following scanner driver and image scanning applications are bundled with the scanner:
Scanner driver
PaperStream IP driver
Image scanning application
PaperStream ClickScan
PaperStream Capture
For details about the scanner driver and image scanning applications, refer to Overview of the Bundled Software.
Scanning procedures, operations, and scan setting items slightly vary depending on the image scanning application and the scanner driver.
For details, refer to the help for the image scanning application and the scanner driver.
-
Insert a document into the return path opening or load a document in the ADF paper chute (feeder).
For details, refer to How to Load Documents.
For the return path opening
Face the front side (scanning side) of a document upwards and insert the top end of the document straight into the middle of the return path opening.
When scanning an open booklet such as a passport, insert the side which has less pages into the middle of the return path opening.

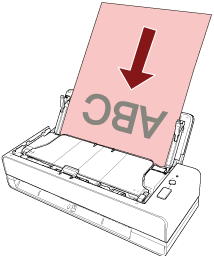
For the ADF paper chute (feeder)
Face the front side (scanning side) of a document upwards and load the top end of the document head-first.
Do not perform an operation to disconnect the connection between the scanner and the computer such as the following:
Disconnecting the USB cable
Logging off
Remove the scanned document from the return path opening. Not doing so may cause a paper jam in the scanner for any subsequent scans.
When the confirmation window for continuous scanning appears, perform either of the following operations:
Insert a document or load documents and press the [Scan/Stop] button to continue scanning.
Press the [Scan/Stop] button without any documents inserted or loaded in order to finish scanning.
If the orientation of the scanned image of the open booklet is incorrect, change the rotation setting in the scanner driver. For details, refer to the help for the scanner driver.