Removing Shadows/Streaks that Appear around Edges of Images [Page Edge Filler (ADF)]
Configure the settings to fill in the shadow or streaks around the edge of the scanned image.
Depending on the condition of the documents that you scan, the shadow of a document may appear as black streaks on the edges of the scanned image.
In this case, remove the black streaks by filling in the edges of the scanned image.
-
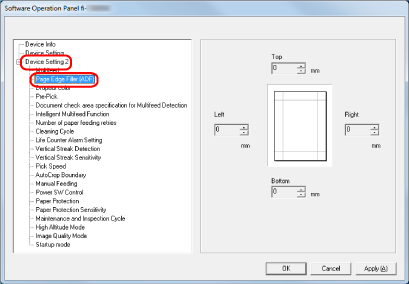
From the list on the left, select [Device Setting 2] → [Page Edge Filler (ADF)].
-
Specify the width of each margin (Top/Bottom/Right/Left) to fill in.
The factory default setting is "0".
The specified area is filled in white or black, according to the background color.
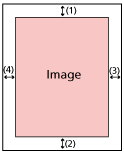
(1): Top = 0 to 15 mm
(2): Bottom = -7 to 7 mm
(3): Right = 0 to 15 mm
(4): Left = 0 to 15 mm
(in 1 mm increments)
ATTENTIONNote that if the target range of page edge filler is too wide, some characters near the edge may appear missing.
TIPYou can change the background color to black or white in the scanner driver.
For details, refer to the help for the scanner driver.
Depending on the value you specify for the bottom margin of the page edge filler, the page edge filler function operates as follows:
1 to 7 mm
Fills in the specified area with the background color from the bottom edge of the image towards the inside.
-1 to -7 mm
Outputs the image without filling in the specified area with the background color from the bottom edge of the image towards the outside. (Outputs the image with the specified area added when [Page End Detection] is set in the scanner driver.)
This setting can also be configured in the scanner driver.
In such a case, the page edge filler of the scanner driver is used on the image which the scanner already filled in the edges.