Replacing the Roller Set
The roller set consists of a brake roller and a pick roller.
Replace each roller in the following procedure.
-
Remove the brake roller.
- Press the cover bushing of the brake roller to open the cover in the direction of the arrow.

- Pull out the left side of the brake roller shaft, and then pull out the right side of the shaft from the hole.

If the animation above does not run, configure the settings of your browser to be able to run the animation.
- Press the cover bushing of the brake roller to open the cover in the direction of the arrow.
-
Remove the brake roller from its shaft.

-
Attach a new brake roller on the shaft.
Insert the protrusion (
 ) on the shaft into the slot.
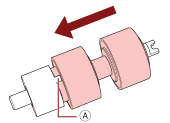
-
Attach the shaft.
- Attach the notch, which is on the brake roller shaft, to the slot on the right then attach the left side of the shaft.

If the animation above does not run, configure the settings of your browser to be able to run the animation.
ATTENTIONConfirm that the brake roller is installed properly. Otherwise, paper jams or other feeding errors may occur.
- Attach the notch, which is on the brake roller shaft, to the slot on the right then attach the left side of the shaft.
-
Remove the pick roller.
- Open the side guides fully to both sides. Then place your finger into the depression and open the sheet guide in the direction of the arrow.
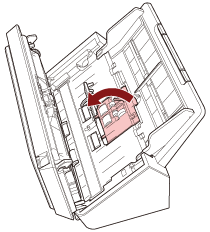
- Slide the pick roller and remove it from the top.

If the animation above does not run, configure the settings of your browser to be able to run the animation.
- Open the side guides fully to both sides. Then place your finger into the depression and open the sheet guide in the direction of the arrow.
-
Attach a new pick roller from the bottom.
- Check the direction of the notch on the pick roller and of the small roller, and insert it in the hole.

If the animation above does not run, configure the settings of your browser to be able to run the animation.
ATTENTIONConfirm that the pick roller is installed properly. Otherwise, paper jams or other feeding errors may occur.
- Check the direction of the notch on the pick roller and of the small roller, and insert it in the hole.