Specify an image scanning application to be launched when the scan/stop button is pressed.
The procedure when the scanner is connected via a USB cable is as follows.
-
Turn on the scanner and confirm that the scanner is connected to the computer via the USB cable.
-
Display the [Control Panel] window.
Windows Server 2012
Right-click the Start screen, and select [All apps] on the app bar → [Control Panel] under [Windows System].
Windows Server 2012 R2
Click [↓] on the lower left side of the Start screen → [Control Panel] under [Windows System].
To display [↓], move the mouse cursor.
Windows 10/Windows Server 2016/Windows Server 2019/Windows Server 2022
Click [Start] menu → [Windows System] → [Control Panel].
Windows 11
Click [Start] menu → [All apps] → [Windows Tools] and double-click [Control Panel].
-
Click [View devices and printers].
The [Devices and Printers] window appears.
-
Right-click on the scanner icon, and select [Scan properties] from the displayed menu.
The properties window of the scanner appears.
-
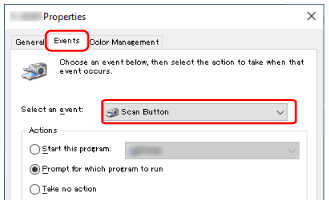
Click the [Events] tab and check that [Scan Button] is specified for [Select an event].
-
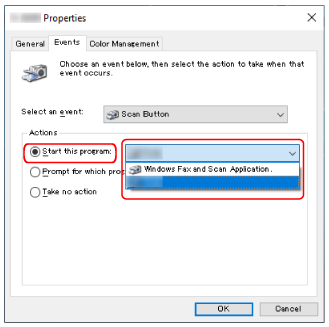
Select an image scanning application to be launched when the button is pressed.
Click [Start this program] under [Actions], and select an image scanning application from the program list.
-
Click the [OK] button.