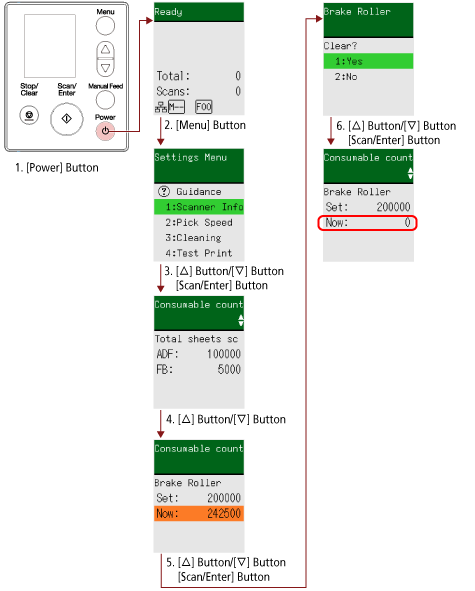
Checking and Clearing the Consumable Counters
- Press the [
 ]/[
]/[ ] button to select [5: Consumable counters], and then press the [Scan/Enter] button.
The [Consumable counters] screen is displayed on the LCD.
- Press the []/[] button and check the counter.
Counters are highlighted when consumable replacement or cleaning is required.
Counters will appear highlighted when:
The page count after the consumable is replaced reaches 95% of the value configured in Specifying the Cycle to Replace Consumables [Life Counter Alarm Setting] in the Software Operation Panel. (For the brake roller/pick roller counters)
The page count after cleaning reaches the value configured in Scanner Cleaning Cycle [Cleaning Cycle] in the Software Operation Panel. (For the cleaning counter)
The amount of remaining ink is below 33%. This is only displayed when the imprinter is installed. (For the ink counter)
HINTThe total number of sheets scanned is displayed in total count. Total count cannot be cleared.
- After replacing the consumables or cleaning, press the []/[] button to select the highlighted counter, and then press the [Scan/Enter] button.
A message appears to confirm that you want to clear the counter.
- Press the [] button/[] button to select [1: Yes], and then press the [Scan/Enter] button.
The counter is reset to 0.
For remaining ink, it is reset to 100.